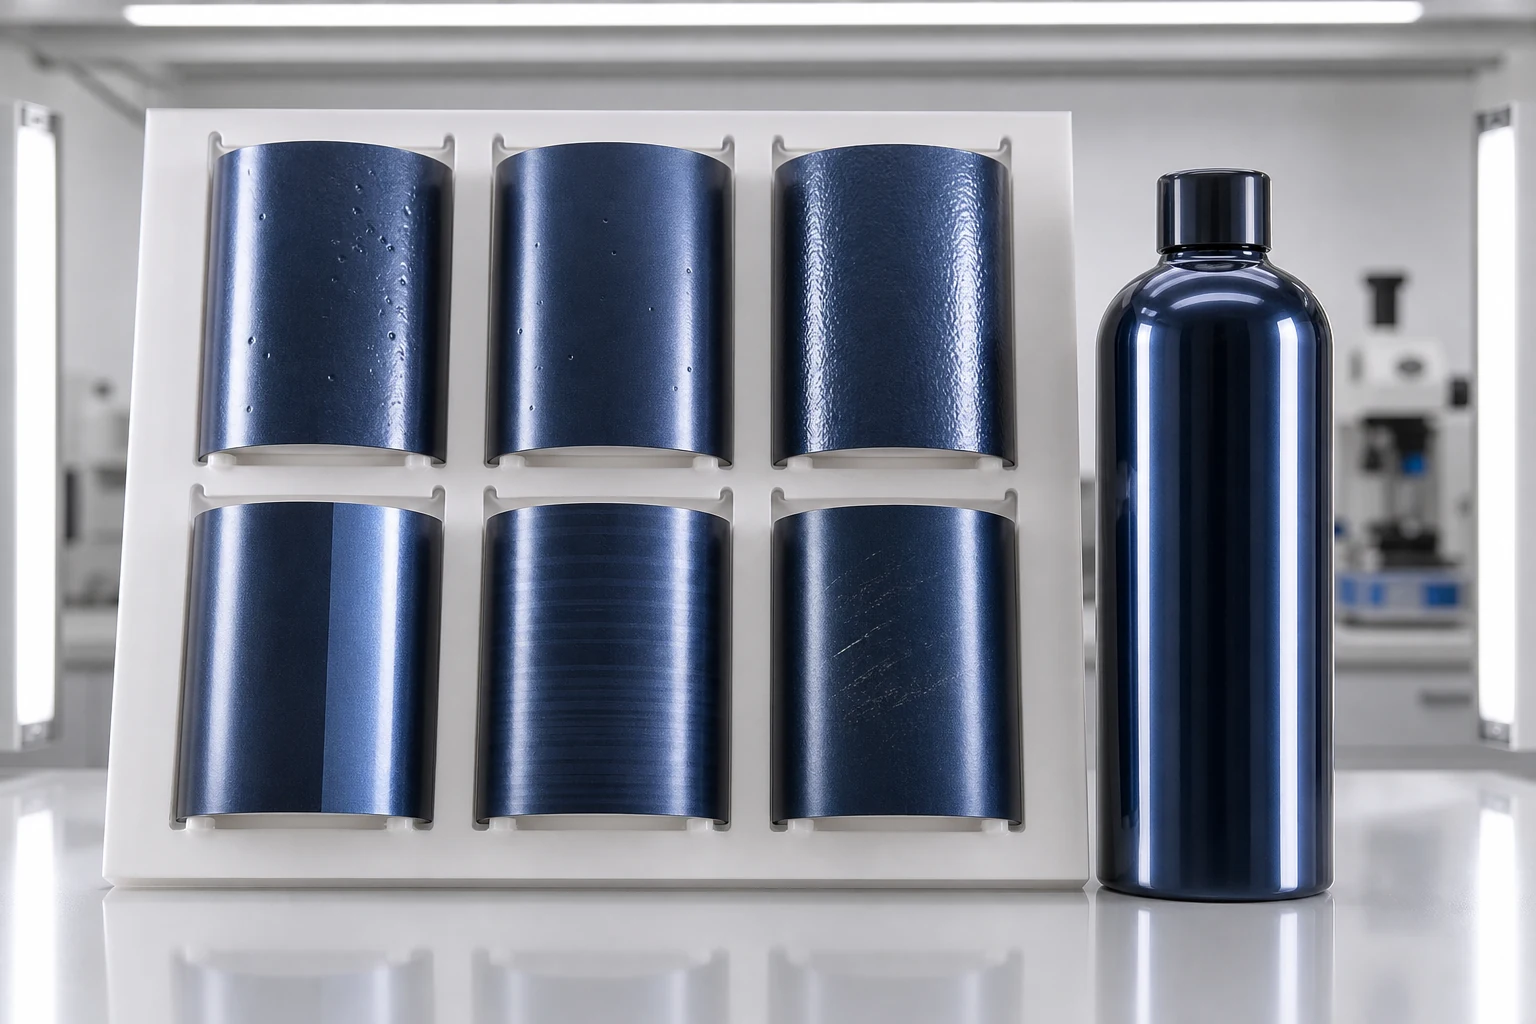
Defect diagnosis starts by naming the visible symptom, mapping where and when it occurs, checking the substrate-to-print process history, and confirming the cause through controlled comparison rather than cosmetic rework alone.
A defect name is not a root cause. “Pinholes,” “poor adhesion,” or “banding” describes what an inspector sees. The investigation still has to connect that symptom to material, contamination, application, cure, equipment, geometry, or handling.
Build a useful defect record
Photograph the defect under controlled light and record:
- Container supplier, lot, and substrate
- Coating and print material batches
- Line, date, shift, and operating settings
- Defect location and orientation on the package
- Frequency within the run
- Whether it appears before or after the next operation
- Cure profile, environmental condition, and handling history
- Comparison with approved standards and retained samples
Location is often diagnostic. Repeating defects at the same rotational position suggest a fixture, seam, print, or handling relationship. Random isolated craters suggest a different path than a uniform texture change across an entire lot.
Common coating symptoms
| Symptom | What it looks like | Investigation starting points |
|---|---|---|
| Cratering | Round depressions in the film | Contamination, incompatible material, compressed air, handling |
| Pinholes | Small openings or voids | Trapped gas, moisture, film, cure profile, substrate condition |
| Orange peel | Uneven wave-like texture | Flow, film build, material condition, application, cure |
| Sags or heavy zones | Local excess film | Application distribution, geometry, preheat, material flow |
| Poor coverage | Substrate visible in transitions | Gun path, grounding, geometry, charge, film target |
| Color or gloss variation | Patchy appearance across package | Film, cure, batch, reclaim, orientation, lighting |
The Powder Coating Institute defines cratering, blistering, back ionization, orange peel, and other process terms in its powder coating glossary.
Common direct-print symptoms
White-to-color misregistration: A white fringe or exposed background around color artwork. Check synchronization, fixture repeatability, artwork separations, and geometric compensation.
Banding: Visible tonal lines in gradients or solids. Check nozzle condition, screening, pass strategy, rotation, head alignment, and source image artifacts.
Double image or slur: A repeated or dragged edge. Check container movement, fixture grip, screen or head relationship, and cure between colors where applicable.
Fine detail loss: Small text fills, lines break, or masks look rough. Check file construction, effective resolution, mesh or droplet behavior, surface texture, ink spread, and cure.
Ink adhesion loss: Printed material detaches while the background remains. Check coating cleanliness, surface condition, treatment timing, ink compatibility, and cure.
Test performance with the right method
Abrasion and adhesion tests are only meaningful when the method and acceptance criterion reflect the package.
ASTM D4060 uses a Taber Abraser on a plane, rigid test surface. ASTM notes that wheel condition, debris, fillers, and other material factors can influence results. A curved bottle may require a representative flat panel or another agreed rub method rather than pretending the standard applies unchanged. See ASTM D4060.
ASTM D3359 and ISO 2409 provide cross-cut or tape-related assessments with defined scopes and limitations. Use the current applicable standard and avoid inventing acceptance language after the test.
Build an inspection sequence
- Incoming: Container condition, contamination, dimensions, and prior treatment.
- After cleaning or pretreatment: Water break or other process-specific verification.
- After coating: Color, gloss, coverage, cure, and coating defects.
- After print: Registration, detail, color, opacity, code function, and cure.
- After conditioning: Adhesion, abrasion, chemical exposure, and appearance.
- After packing simulation: Scuffing, partition contact, and shipping orientation.
Create a boundary sample library
An approved master shows ideal appearance. Boundary samples show the edge of acceptance for recurring visual conditions. Photograph them, protect the originals, and review them under consistent light.
Do not create a boundary sample for a condition that signals functional failure. Adhesion loss, unreadable codes, closure interference, or exposed restricted material should follow the defined rejection and corrective-action process.