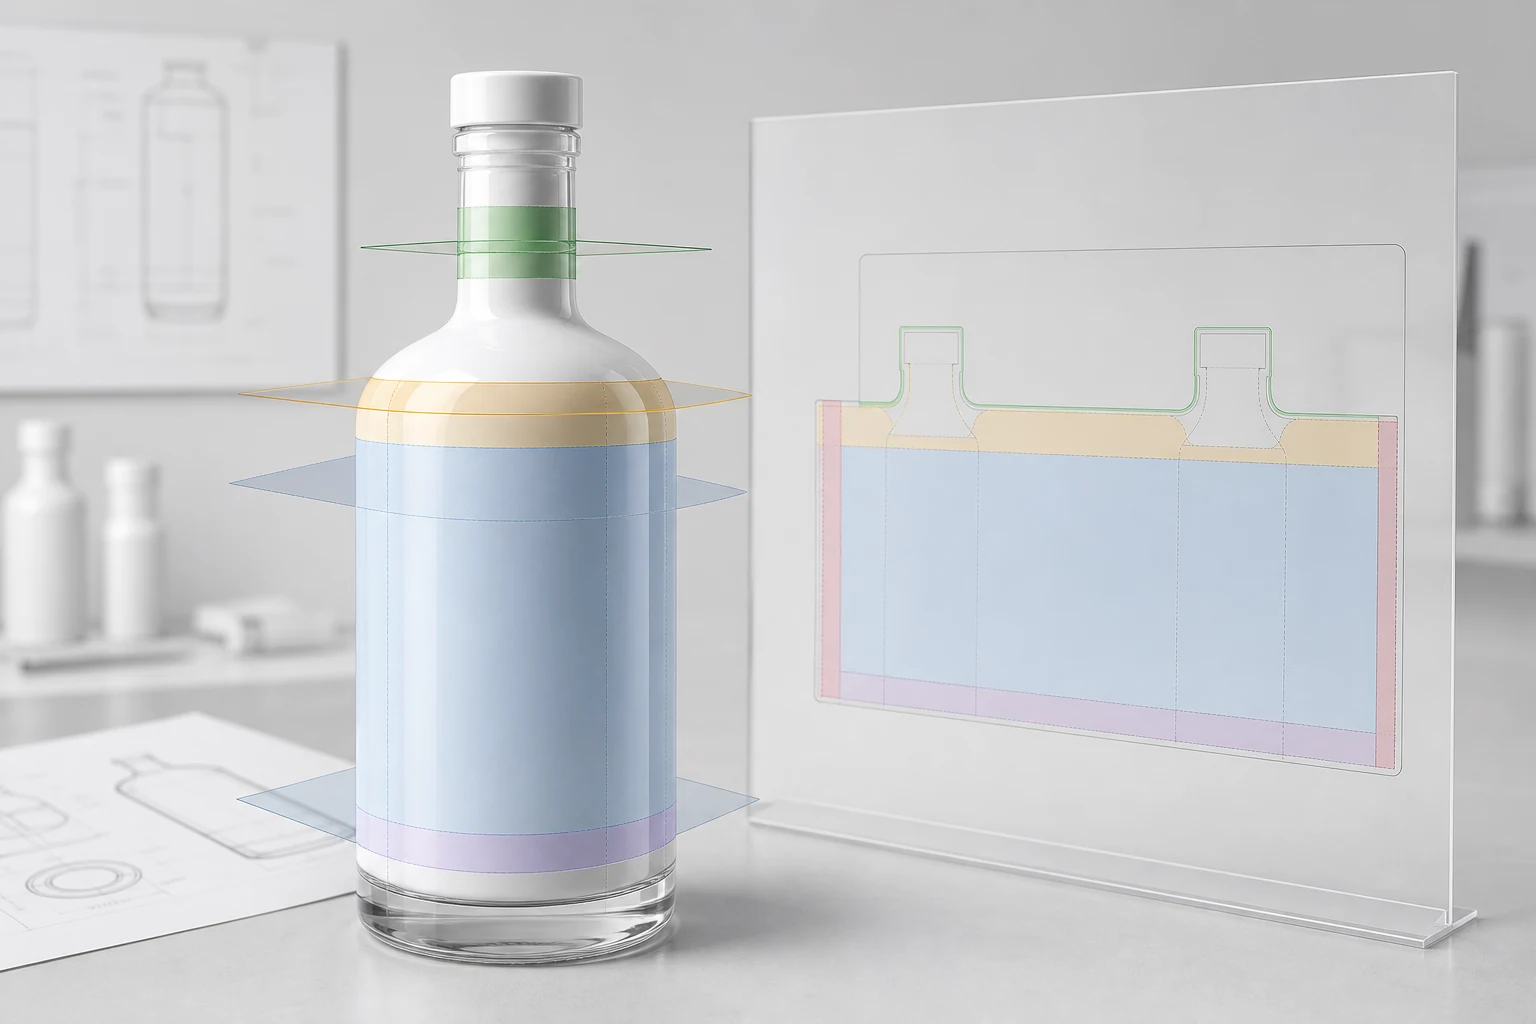
The usable print area is the stable body region that the qualified process can reach and register, excluding the neck, severe transitions, handling zones, and a protected strip around the back seam.
A bottle wrap looks rectangular in an artwork file, but the production object is curved, tapered, and handled by equipment. The purpose of a print-area drawing is to translate those constraints into a design space that remains predictable.
Separate visible area from printable area
The visible body may extend almost to the shoulder and base. The qualified print area is usually smaller. It allows for process approach, rotation, fixtures, dimensional variation, and registration.
The decoration drawing should show:
- Maximum horizontal wrap
- Maximum vertical image height
- Front centerline
- Back center and protected rear zone
- Shoulder and base boundaries
- Neck restriction
- Orientation to closure or other features
The rear restriction does not have to appear as a visible line on the final package. It is a prepress and placement constraint that prevents artwork or a QR code from crossing an area the printer cannot reproduce reliably.
Diameter controls circumference
For a true cylinder, circumference is diameter multiplied by pi. The theoretical circumference is not automatically the printable wrap. The process needs a margin for start and stop behavior, registration, and the protected back region.
Use measured production diameter rather than a nominal catalog dimension when fit is critical. Small diameter changes alter circumference and can shift where a broad wrap ends.
Taper requires distortion compensation
On a tapered body, circumference changes with height. A rectangular wrap cannot lie on that surface without distortion. Horizontal features can rise, fall, or compress as the container rotates through the print process.
Use a container-specific distortion template created from geometry and process testing. Keep circles, faces, QR codes, and critical typography within the most stable region. A visually “straight” line in the flat file may need to be curved in prepress so it appears straight on the object.
Shoulders and heels are transition zones
As the bottle turns into the shoulder or base radius, the surface normal changes rapidly. Screen contact, printhead distance, droplet angle, or coating distribution can become less uniform. Treat these regions as conditional unless the process has been developed for them.
Artwork can visually approach a transition without physically printing on it. Open space, a coating change, or an element that ends deliberately before the curve usually looks more refined than detail that fades accidentally at the process limit.
Do not treat the neck as body print area
Necks introduce small diameter, threads, closure interfaces, abrupt transitions, and handling. Unless a dedicated neck-decoration process is specified, keep artwork off the neck and closure sealing surfaces.
This also improves hierarchy. The body carries the primary identity while the shoulder and neck preserve the shape and closure function.
Protect aspect ratio
A circular mark should remain circular and a QR code should remain square on the intended front view. Distorting the flat asset to fill more space can create a visibly stretched result and reduce code reliability.
Scale vector artwork proportionally. Apply only the process-specific geometric compensation supplied by prepress. Review the mapped result from front, quarter, side, and back views.
Placement controls should reflect real freedom
In a digital preview, artwork should be movable across the full qualified body area and scalable from a small mark to a broad wrap. Constraints should stop the artwork at the neck, top and bottom print boundaries, and protected back zone without forcing every design into a narrow central panel.
The preview remains directional. Final placement should be converted into production coordinates using the approved drawing and actual container fixture.
Geometry handoff checklist
- Supply a dimensioned container drawing or production sample.
- Identify the intended viewing front and closure orientation.
- Confirm whether the body is cylindrical, tapered, oval, or compound.
- Mark handling, seam, and restricted zones.
- Obtain the decorator's qualified print template.
- Review artwork on a three-dimensional proof without changing its aspect ratio.
- Produce physical samples before final approval.